Closure grouting is the process of drilling and grouting the first holes in an area fairly widely apart, then drilling and grouting a hole midway between them, then putting holes midway in the remaining gaps, and so on, continuing this process of halving centres until enough grouting has been done.
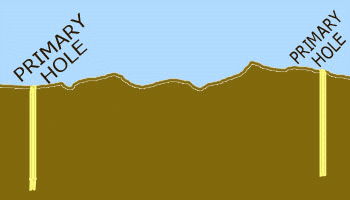
The first holes are usually called PRIMARY.
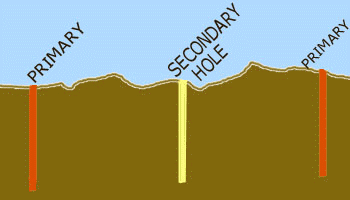
The holes midway between them usually are given the name SECONDARY.
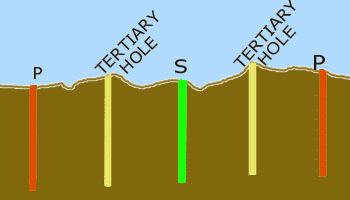
Those halving the resulting spaces are called TERTIARY.
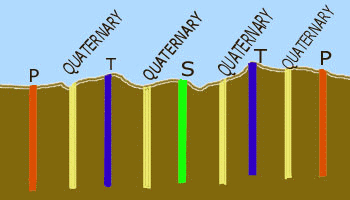
The next sequence of holes is called QUATERNARY. If further closure is required, the names are QUINARY, SEXTARY, SEPTENARY, OCTARY and NONARY, and by this degree of closure the holes would be so close together that there wouldn't be room for any more, in that row at least.
There are other designations for closure holes, for example, A, B, C, D, etc. or 1, 2, 3, 4, . . . but these can get confused with curtain row designations if there are multiple rows similarly named, or with hole numbers.
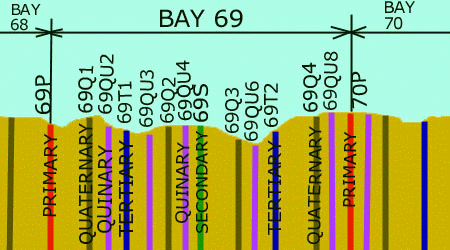
This sketch shows a suggested numbering method for grout holes when doing closure grouting. The interval between primaries is designated as a 'Bay', and these are numbered consecutively from one end of the job. The individual holes in a Bay are given its number plus the following:
- P for Primary
- S for Secondary
- T1, T2 for the two Tertiaries
- Q1 to Q4 for the four Quaternaries
- QU1 to QU8 for the eight Quinaries
- X1 to X16 for the sixteen Sextaries
Nomenclature after Sextary is on-site derived. Note that progression beyond Quaternaries is usually only needed on difficult jobs.
The Concept of Closure
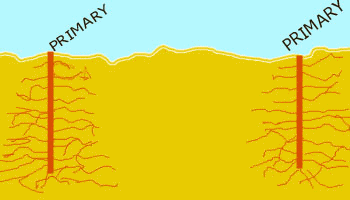
Ideally, grout should penetrate outward from primary holes, as shown in the sketch.
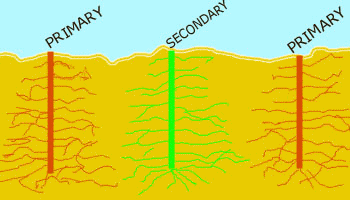
When a secondary hole is grouted, the added penetrations which should result are illustrated.
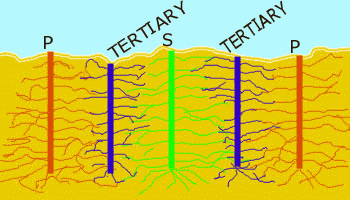
When the tertiary sequence of closure is reached, penetrations of grout may start to overlap. Quaternary and later holes may be necessary to give complete overlap.
Note that the penetrations shown in these sketches are only indications, and actual penetrations may be very different and nonsymmetrical.
The extent of grout travel from grout holes depends on many factors, such as Crack size, Grout mix, Mixing methods, Injection methods, Pressure, Crack configuration, Stage method, Rock movements, Connections between holes. And there are others.
Closure methods are particularly useful for grout curtains; the grouting is closed down to the required standard of tightness or to some appropriate spacing. By comparing water test results and cement takes in the holes as the closure proceeds, a measure is obtained of the grouting's level of success (or lack of it). This comparison may indicate that changes to techniques are necessary; it also helps with decisions about when to stop grouting.
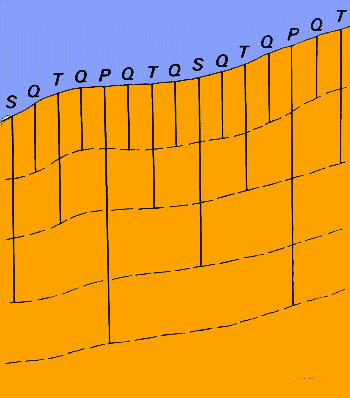
For curtains with several stages, this is the recommended layout. It usually combines economy with quality work. It avoids doing needless grouting, while at the same time it enables extra grouting to be given to bad spots found while the work is in progress. The foundation is, in effect, probed and checked more thoroughly than scattered investigation holes can provide.
By showing a layout such as this on working designs, and providing suitable clauses in the specification permitting considerable variations to the design, any weak spots or unexpected features can be readily given additional attention as found warranted. The concept is as follows:
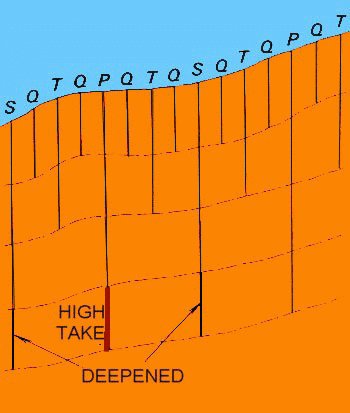
- I. Primary holes (P) are taken down to the base of the curtain.
- 3. Tertiary holes (T) go down to the third bottom stage but are extended below this on both sides of any secondary that has shown relatively high takes or is too far above the target standard.
- 4. Quaternary holes (Q) go down for only one stage or so but are extended down on both sides of any tertiary that has shown relatively high takes or is too far above the target standard.
- 5. Quinary and subsequent holes may also be warranted on both sides of earlier holes where takes are too far above the target standard.
- 6. Quinary (and maybe subsequent holes in extremely difficult sites) may need to be shown on the design drawings where primaries are widely spaced or the rock is very weak.
2. Secondary holes (S) go down to the second bottom stage (or not as far if the rock tends to be tight) but are extended to the bottom stage on both sides of any primary that shows relatively high water and/or cement take. The illustration shows an example of this.
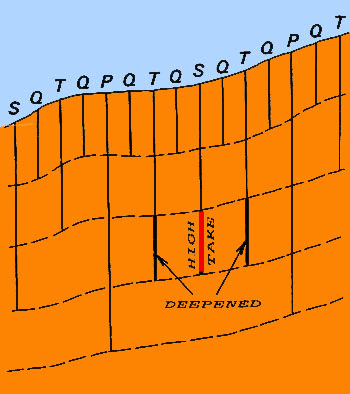
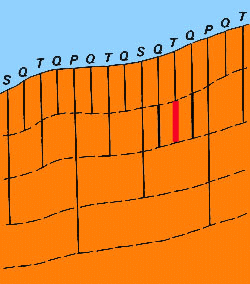
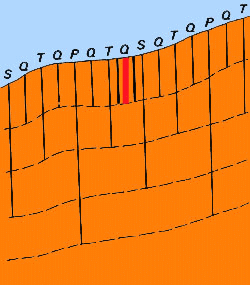
The layout discussed applies particularly to foundations where the permeabilities decrease with depth and the bottom stage is in rock having a permeability not greatly in excess of the required standard. There are many variations on the theme: one extreme is where permeabilities remain high for the full depth of the curtain coupled with short penetration distance, - in such a case it would probably be fairly evident at the start that tertiary and possibly even subsequent holes will need to go to the full depth.
The distance between primaries in a curtain should be as regular as possible in order to simplify setting out and thus minimize errors. Primary holes should not be so close that they connect with each other; connections at this juncture can jeopardize the qualiy of grouting and interfere with proper evaluation of takes. On the other hand, primary holes should not be so wide apart that it is necessary to routinely close down to such remote sequences as sextary or septenary in order to get a reasonable spacing of final holes.
The following are some typical spacing of primaries:
- 40 ft [12 m] For most sites
- 20 ft [6 m] Where permeabilities are low enough to ensure very few connections
Note that primary spacing should be divisible by four to simplify spacing of the subsequent holes (as far as quinary anyway).
With primary spacing of 40 ft [12 m], quaternaries will bring hole spacing down to 5 ft [1.5 m], and with primaries at 20 ft [6 m], tertiaries will give this spacing.
It is not usually wise to specify a final hole spacing on designs because this inhibits proper intensive treatment of any surprise feature found in the work. On the other hand, it can become absurd to continue closure until the holes nearly touch each other: recommended treatment when continued closure does not achieve target standards is to cease closure in the original curtain row when about 2.5 ft [0.75 m] is reached and then to place any further holes necessary slightly to one side and the other of the row. This gives a widening of treatment at the bad area, which probably suffers from lack of penetration and will accordingly benefit from such widening.
THAT COMPLETES THIS PROGRAMME
SOME INFO....
This is an abbreviated extract from Version 10.0 of the series of ROCKGROUT grouting programmes. The version is on DVD but is not yet publicly available
The DVD contains all of the book Construction and Design of Cement Grouting together with the contents of this Web site and some additional matter.
....and here is a suggestion: If you have reached this page without going to "HOME", then go there now to get access to the many pages listed there.